
Shapeoko3, one year later.
Overview
When I bought the Shapeoko3, it was the first time I dipped my toe in world of CNC, and at the time I shared my experience here. After about one year of using it, I figured it would be a good time to look back and share my updated feedback about CNC in general and the Shapeoko3 in particular, so here goes.
TL;DR
It’s been almost a year now. Still not bored, enjoying the Shapeoko as much as I did on day one. Developing a mild addiction to CNC in general. Friends & family very happy with the unexpected gifts.
Gear
First, some feedback on the setup I have been using.
Shapeoko3
In short: I would buy it again without thinking twice. I almost expected to get bored and move on to something else after a while, but instead I need my weekly dose now. As far as I am concerned, the Shapeoko is the perfect mix of a hobby and a productivity tool: sometimes I just turn it on to get things done, just like any other power tool, and the workflow is simple enough to do just that. Other times, I’m in the mood to experiment/learn/tweak, play with various CAD/CAM solutions, consider HW upgrades, try new types of endmills, optimize feeds and speeds…and I have yet to find a case where I felt the Shapeoko design was limiting any of this.
Other hobbyist-grade CNC machines out there are probably quite fine too, but so far I have not had any regrets nor impulse to compare/change.
I am particularly happy that in these times of cloud-based-anything, the Shapeoko can be used in a purely local setup with no internet connection involved.
Shapeoko model / Work Area
I bought the standard size Shapeoko, the actual max work area I can use is 40cm wide by 35cm deep. For 90% of what I have done so far, this was large enough (or at least I designed parts within these limits). There are a few occasions where I would have liked the extended area of a Shapeoko3XL, and Carbide does sell an extension kit to transform a standard shapeoko into and XL, but my garage space will not allow it anyway.
Community / Support
Along with my CNC addiction came a slight addiction to the Shapeoko forum: it’s been a year, and I have been checking it almost daily since I bought the machine. It’s like AA minus the guilt: great people, great advice, lots of inspiration and motivation to DO things with machine, experiment new materials or techniques…
The Carbide3D email support was top notch when I had a few issues initially (see original blog page), I see on the forum it still is, and luckily for me I have not had to use it at all for a year (which also talks for the quality of the machine).
Calibration & tuning
In the first weeks, I focused a lot on squaring/tramming/calibrating the machine. This was definitely useful, as I think it gave me a solid setup to start actual projects, without the frustration of geometry issues in the CNCed parts. Over the last year, I stopped worrying about getting optimal accuracy/precision, and as I am not working on parts requiring very tight tolerances (e.g. metal), I have not had any noticeable precision issue (that a light sanding could not fix).
Maintenance
My Shapeoko undergoes moderate use, I would say it runs one or two times a week, for jobs between 10 min and 1 hour. Overall, over one year the mechanical maintenance effort was minimal, which was a good surprise. I just had to :
- re-tighten Z-axis belt once
- re-tighten the router holder once
I bought spare carbon brushes for the Makita router, to anticipate the unavoidable moment when they will be all used up, and the router will stop working. But so far, so good.
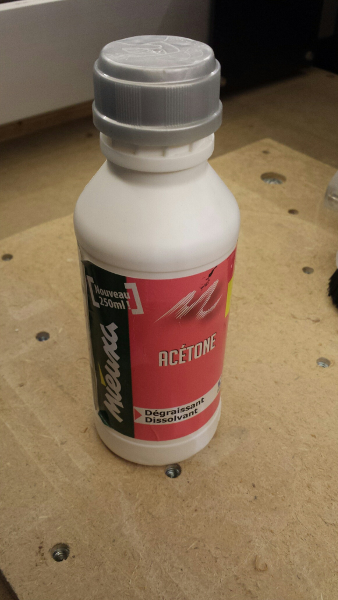
For cleaning my endmills, I use acetone, which does a very good job at removing gummed up tape&glue from the tip.
Crashes
Either I am very careful or not daring enough, but I have not had a single machine crash in the last ~10 months. The one crash I did have was all on me: I changed tool in the middle of a job, and in the process of re-zeroing the machine, I used the Carbide Motion feature to return to “previous zero + 6mm” height…forgetting that my new tool was longer than the first one, so this “previous Z + 6mm” ended up being inside the material…silly mistake, that I will not be doing twice.
One “close call” I had was the first time I used G-code generated from Vectric V-carve, using the default post-processor that…does not retract the endmill along Z before starting. More on this below.
CAD/CAM Software
The Shapeoko comes with a software suite that covers the full CNC workflow:
- Carbide Create for designing parts and carving toolpaths, and generating the G-code to be sent to the machine controller.
- Carbide Motion for talking to the machine controller, i.e. jogging, zeroing, and running a job.
Carbide Create was perfect for me as a CNC beginner, I used it for about 9 months and really liked it, I think Carbide3D did an excellent job of providing a tool that is simple enough to be up and running quickly, and not have to spend weeks learning tens of menus/features. However after a while a few things made me consider moving to a different tool though:
- there is no toolpath execution time estimation. I have been using an online viewer (this one), which provides this missing info, but it gets old after a while.
- there is no easy way to import parts/vectors from one project into another project, or put parts in a library of some kind to be reused.
- Large projects with lots of vectors are not managed well, to the point where the interface freezes when trying to import a complex SVG file.
- but above all of this, there is (in my configuration at least) a VERY annoying SW crash that happens from time to time upon doing “Ctrl+Z”, which I use a lot. Nothing like loosing 15 minutes of work to get you mad. I developed a habit of hitting “Save” very often, but honestly that is not something one should have to worry about.
- Carbide Create being proprietary SW (closed source), I could not investigate the crash myself either.
Most people (as far as I can tell from the forum) turn to Adobe’s Fusion360 as they outgrow Carbide Create, I tried it and it is indeed a fantastic CAD/CAM suite, but it just felt overwhelming/too feature-rich and not quite for me yet.
I heard about Vectric V-Carve on the forum, tried it and finally bought it:
- despite the name, it is a full-fledged CAD/CAM SW, not just for V-carving.
- it includes the full workflow from drawing the vectors, to creating the toolpaths, to previewing them (with a nicer rendering than Carbide Create), to simulating toolpaths and estimating their runtime, and finally exporting custom G-code.
- it is EXPENSIVE (330 euros), but after using it for a while now I must admit it is also worth it. No offense to Carbide Create (and no comparison either, how fair would it be to compare a 350$ product to a free software…), but it just does everything better, bug free, while staying just as simple. No regrets.
Note: the one issue I had initially though, is that the “Shapeoko” post-processor that comes with V-Carve, generates G-code that does NOT have a tool change command at the beginning of the job. And my routine relies on this tool change (that Carbide Create did generate, and Carbide Motion manages), to make sure everything was in order, start the router, close the enclosure, and finally start the actual carving. So my first run of V-carve generated G-code almost resulted in a crash, since I did not have time to start the router before it starting moving…I hit the emergency button just in time.
But luckily, it is very easy to write a custom post-processor for V-carve, so I just copy/pasted the Shapeoko one, and added the “M6 T1” (G-code for tool change) in the post-processor so that it gets included in the generated G-code. I archived it here. I am still using Carbide Motion as my only machine controller, it has the basic feature set that works for me:
- jogging and zeroing
- loading a job
- running a job with pause/resume/stop functions,
I initially installed Carbide Motion 3, and now I upgraded to Carbide Motion 4 (with the associated update of the GRBL SW version inside the Shapeoko) to get a nice smooth jogging that CM3 lacked, and get the feedrate override function (quite useful when trying to figure out optimal feeds & speeds for a new material)
Since I have now established a precise workflow for running jobs without mistakes, and considering I do not see any specific limitations in CM4, I will stick with it for now if only by lazyness.
Note: it has one minor but annoying bug, when loading a new file, the associated data (e.g. min/max X/Y/Z covered) does not get refreshed sometimes, the values from the previous file are displayed. Once you know it and “trust” that the file was properly loaded, one can live with it.
Endmills
Here’s a list of the endmills I have, and how often I actually use them for the kind of projects I do:
- 1/4” 3-flute square endmill (Carbide’s #201) => the workhorse, used weekly.
- 1/4” 3-flute ballnose endmill (Carbide’s #202) => infrequently, but very useful in some situations (rounded pocket edges)
- 1/8” 2-flute square endmill (Carbide’s #101) => second most used endmill.
- 1/8” 2-flute ballnose endmill (Carbide’s #102) => infrequently
- 0.063” 2-flute square endmill (Carbide’s #111) => very rarely
- 0.063” 2-flute ballnose endmill (Carbide’s #112) => very rarely
- 0.032” 2-flute square endmill (Carbide’s #121) => never used.
- 0.032” 2-flute ballnose endmill (Carbide’s #122) => never used.
- 60deg V-bit => not used much so far, no specific reason, I just like the outcome of V-carving with the 90° one better.
- 90deg V-bit => I did a lot of MDF V-carving, some oak.
- Diamond drag bit => used a couple of times for very specific projets (see below). Expensive, but worth every penny.
- Fly cutter => just used a couple of times to surface the wasteboard
- PCB carving endmill => very specific, but mandatory to do…PCBs (which I do from time to time)
- various other cheap endmills from eBay => never used, or was disappointed with the results.
It’s difficult as a beginner to figure out which endmills to purchase first, and it really depends on the type of projects. Luckily for me I won a set of Carbide3D endmills in one of their contests, so this problem went away quickly.
The other thing that is difficult to evaluate is how quickly they wear out and should be replaced. I suppose the answer is “it depends” (on the material being cut and how many hours of cutting the endmills see), in practice after a year I have not bought any new endmills yet.
Vaccum system
Lessons learned this year:
- the “dust bucket + cyclone dust collector + any shop vac” combo is working really good.
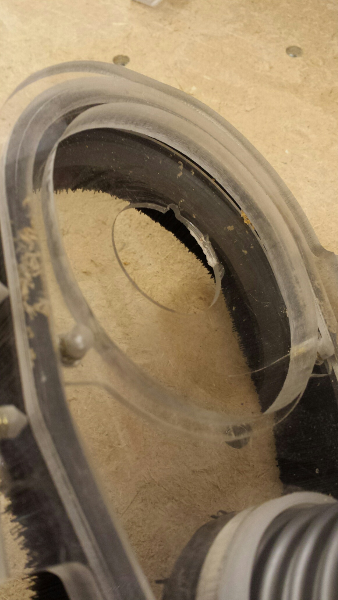
- no regret about buying the (slightly expensive) Suckit dust boot: in daily use it’s quite convenient to use, and does the job well. I have no experience with cheaper/homemade dust boot, but the effort was not worth the trouble for me. It is quite sturdy, yet I managed to damage it a little (all my fault):
Enclosure
My conclusions so far:
- I’m glad I built one (so many things nearby waiting to fall on the Shapeoko…)
- The reduction in noise is significant, now the main noise is the vaccum system. But as long as I can run jobs late in the evening without my neighbour (or wife) complaining, I’m fine.
- Some people build enclosures where the machine is close to the ground: I would never do that, I appreciate being able to reach in the machine at waist level, for loading/unloading material, changing endmills, etc…
Wasteboard
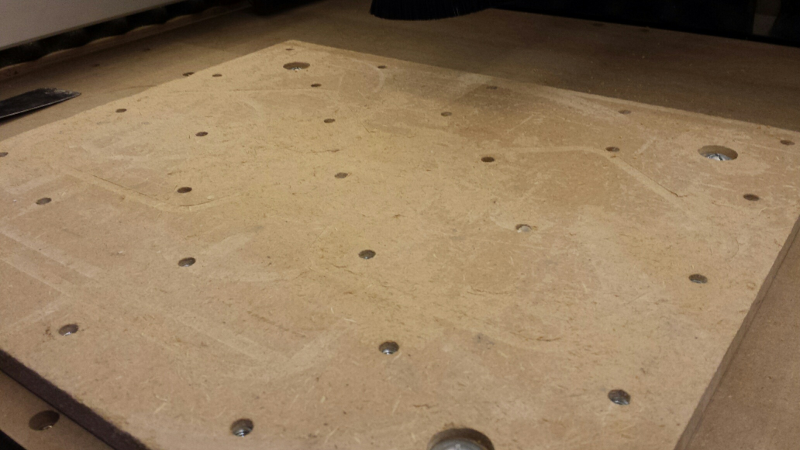
Obvious conclusion #1: a wasteboard is indeed mandatory (unless you are ok with ruining the bed of your shapeoko), and#2 : surfacing it is also mandatory to get nice flat pocket bottoms. I wondered how often I would have to change or resurface my wasteboard, but it turns out that we minimal caution in designing the toolpaths, it barely gets scratched during jobs. I re-surfaced it once in one year. 6 months or so after re-surfacing, it looks like this (i.e. in need of a new resurfacing):
So overall, not much maintenance involved.
Control box
After a few months of using the machine, I added this custom control box to the side of the machine:
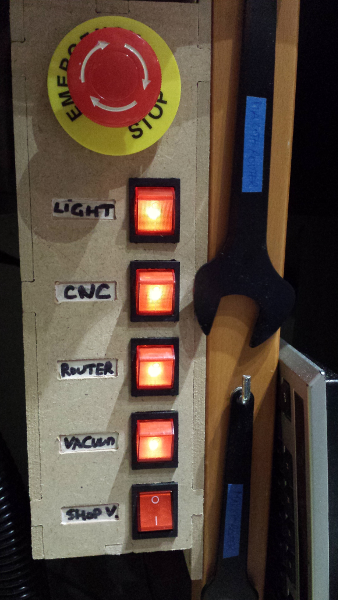
The obvious added value is the big red emergency stop, and it also puts the buttons for turning the machine/enclosure lights/router/vacuum system on and off, right under my hand. Very convenient.
RPM Tachymeter
The cheap laser tachymeter I bought turned out to be useful: everytime I have to adjust RPM on the router, I use it and do not bother looking at the dial indicator on the router anymore. It provides a much more precise (hence repeatable) control of the RPM, so once I figure out a good value for a given material and feedrate, no surprises.
Feeds and Speeds
So, like every other beginner this is the point I worried the most about initially. While I understood the concept/math around feeds and speeds, several elements made things awkward at first:
- Carbide Create is setup to provide appropriate values for the Nomad CNC, not the Shapeoko. Which by the way is not cool (I’m looking at you Carbide3d! How hard would it have been to introduce a setting in CC to select Shapeoko vs Nomad?). So very often, Carbide Create suggested values ended up being completely unpractical with a Shapeoko and Makita router (e.g. RPM values below 10.000RPM…so each time I had to use a higher RPM, I add to compensate feedrate accordingly, not very fun)
- the various tables of recommanded feeds and speeds for the Shapeoko are nice, but…half the time, the combination of material & endmill that I was using turned out to not be included in the table.
- So I tried to take the “easy” (and expensive) way out: buying G-wizard. I really tried to learn it, and I’m sure it’s the perfect tool for people for people who know what they are doing already, but one thing threw me off: the turtle/hare slider. It is supposed to reflect how “aggressive” you want your feeds and speeds to be, which is a nice idea, but in all the scenarios I used, the output recommanded values varied WILDY when moving this slider, which confused me a lot (after hearing and reading everywhere that there is often one sweet spot for each material/endmill combination…it did not seem to make sense). To each his own, I just gave up.
So in the end, I now rely on the good old method of trial & error, and reusing feeds and speeds that worked for me. Below is a summary of values I have been using across various projects. They are by no mean optimized, nor recommanded, but they WORK for me so I am capturing them here for my own use.
| Material | Endmill | #Flutes | RPM | Feedrate (mm/min) | Depth of Cut | Plunge Rate (mm/min) |
|---|---|---|---|---|---|---|
| Beech | 6mm square | 2 | 12000 | 1905 | 1mm | 476 |
| Beech | 3.175mm square | 1 | 12000 | 425 | 0.7mm | 100 |
| Bamboo | 3.175mm square | 2 | 12500 | 1000 | 0.7mm | 100 |
| Bamboo | 6.35mm square | 3 | 15000 | 1524 | 1.5mm | 200 |
| Bamboo | V-bit 60° | 2 | 15000 | 800 | 5mm | 350 |
| Oak | 6.35mm square | 3 | 15000 | 1980 | 2mm | 200 |
| Oak | 0.063” square | 2 | 12000 | 635 | 0.8mm | 381 |
| Acrylic | 6.35mm square | 3 | 12000 | 2000 | 1.5mm | 635 |
| Acrylic | 3.175mm square | 2 | 12000 | 700 | 0.7mm | 150 |
| HDPE | 6.35mm square | 3 | 12000 | 2850 | 2mm | 100 |
| HDPE | 3.175mm ballnose | 2 | 12000 | 840 | 0.7mm | 100 |
| MDF | 6.35mm square | 2 | 12000 | 1905 | 1mm | 476 |
| MDF | V-bit 90° | 2 | 15000 | 1000 | 6mm | 350 |
| Aluminium (pocket) | 6.35mm square ZrN coated |
3 | 16000 | 1220 | 0.38mm | (ramping) |
| Aluminium (contour) | 6.35mm square ZrN coated |
3 | 16000 | 1220 | 0.38mm | (ramping) |
| Aluminium (adaptive) | 6.35mm square ZrN coated |
3 | 16000 | 2438 | 1.9mm opt load 0.635mm |
(ramping) |
| Aluminium (pocket) | 3.175mm square ZrN coated |
2 | 10000 | 508 | 0.305mm | (ramping) |
| Aluminium (contour) | 3.175mm square ZrN coated |
2 | 10000 | 508 | 0.254mm | (ramping) |
| Aluminium (adaptive) | 3.175mm square ZrN coated |
2 | 10000 | 762 | 0.762mm opt load 0.305mm |
(ramping) |
| Aluminium (pocket) | 1.5875mm square ZrN coated |
2 | 10000 | 355 | 0.2mm | (ramping) |
| Aluminium (contour) | 1.5875mm square ZrN coated |
2 | 10000 | 355 | 0.2mm | (ramping) |
| Aluminium (adaptive) | 1.5875mm square ZrN coated |
2 | 10000 | 762 | 0.5mm opt load 0.23mm |
(ramping) |
Work routine
My routine for running a job has stayed the same after one year, and it goes like this:
- initially, everything powered off
- open the enclosure
- load the stock material on the machine bed, mark the zero point (usually the center of the stock)
- double dose of safety: I make sure that both the switch on the Makita router itself, AND the router power switch on the control box, are OFF.
- move the gantry (GENTLY/SLOWLY) by hand towards the front
- remove the bottom part of the Suckit Dust boot
- insert the selected collet and endmill, fasten them tightly, and put the Makita switch to on (router power switch still OFF)
- on the laptop connected to the machine, launch Carbide Motion
- turn on the Shapeoko, hear the stepper motors click in place
- Hit the “Connect” button, load the G-code file.
- Go to Jog menu, do the Homing, then Jog to the center ref position, then manually in X and Y using the “Fast” setting to be more or less above the zero point marked on the stock.
- Jog down along Z, still on “Fast setting”, and stop the movement around 1cm before the surface
- Switch to “1mm” jogging step, and continue moving the endmill towards the surface, until it is about 1-2mm away from it
- Switch to “.1mm” jogging step, insert a piece of paper under the tip of the endmill, and jog down step by step until the moment when the endmill tip touches the paper just enough that it cannot be wiggled around freely anymore, but still allows to pull it out.
- In Carbide Motion, in “Set Zero” menu, click on “Clear all offsets” then on “Zero All”
- In the Run menu, click on “Start”: since the generated G-code includes a tool change command, the gantry will retract on Z, then Carbide Motion will stop and pop-up the window requesting to check the tool.
- This when I close the front door of the enclosure, then switch on the router power, then switch on the vacuum power.
- Finally click “Continue” in the tool check/change pop-up window, and the job starts.
- after the job completes, turn off the router, turn off the shapeoko
- open the enclosure, manually vacuum the extra chips lying around
- clean the tip of the endmill as necessary.
Workholding
For the first few months, I used clamps to hold stock onto the wasteboard. And made a nice clamp organizer too:
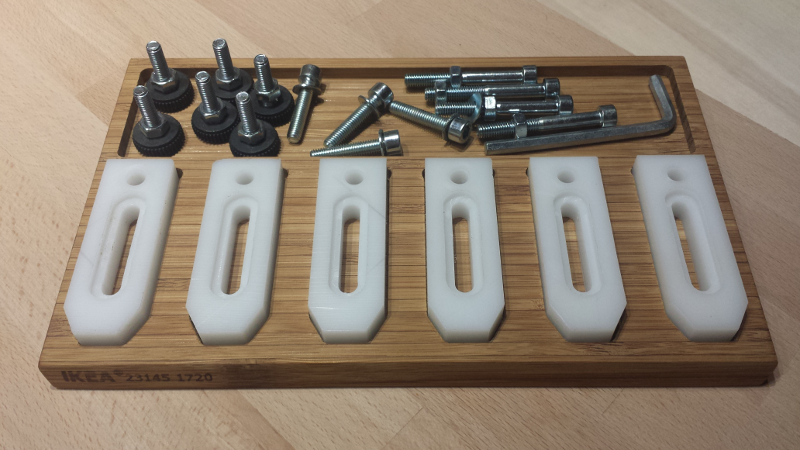
But it always felt like a burden to position/fasten/release clamps everytime, and above all I really disliked the fact that to make sure the dust boot would not interfere with the clamps during a job, I had to reduce the carving area to something smaller than the stock. Then one day on the forum I heard about the “CA glue & tape” workholding method, tried it, loved it, and I have not looked back since then. My clamps are now collecting dust in a corner, crying.
At least for working with wood/plastics, this method feels so much greater than any other for me. It goes like this:
- requirements: any kind of CA glue (called “Superglue” over here), and pretty much any kind of masking tape (I used cheap rolls sold by 4)
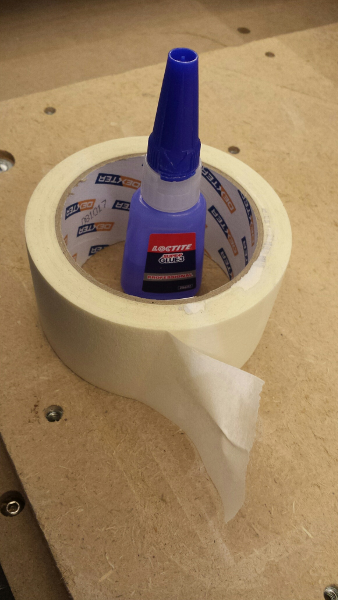
- tools involved:
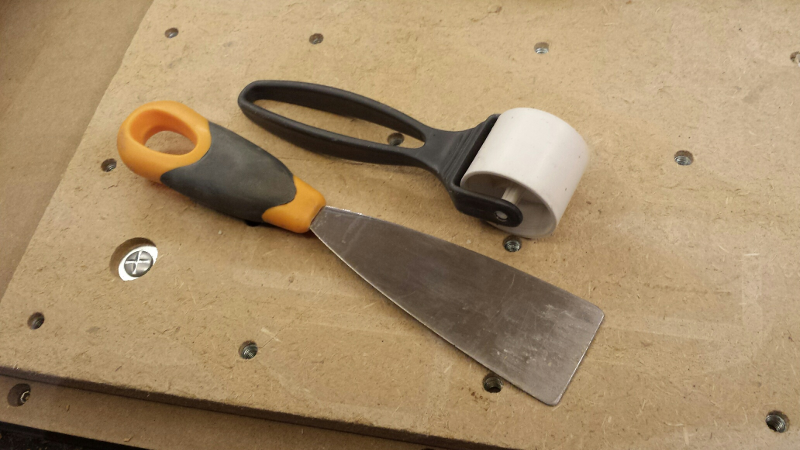
- stick a few strips of masking tape on the bottom of the stock
- use the roller to push/flaten the tape against the stock
- stick corresponding strips of masking tape on the wasteboard
- use the roller to push/flaten the tape against the wasteboard
- apply a few zigzags of CA glue on the masking tape on the wasteboard side
- position the stock on top of it, push and hold firmly for 10 seconds…and you are done.
The holding force in X and Y direction is surprisingly good, I have not had a single piece of stock fly away during a job. Once the job has finished, just insert the scraping tool between the wasteboard and the bottom of the stock, pull vertically (gently), and the piece will come loose easily.
A year of projects
As a memory lane for myself, and potential inspiration for others, here’s a recap of some of the projects I did in that first year of using the Shapeoko.
V-carve + MDF = awesomeness
V-carving is one of the first thing I tried after buying the Shapeoko, after all it is a very typical use of CNC. But at the time, I tried it using a cheap V-bit off eBay and used pine as the stock material, which turned out to be a good recipe for disappointment. Months laters, I saw this Aztec/Star Wars calendar thread on the forum, and decided to give it a try. And I discovered that a decent V-bit (I used the one from Carbide3D store) and MDF can do WONDERS for a beginner:
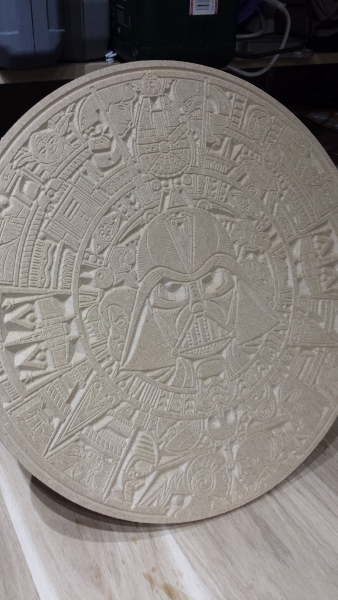
After the classical trick of spraying copper paint, then using black acrylic paint in recesses, and wipe the excess pain on the surface, I ended up with this:
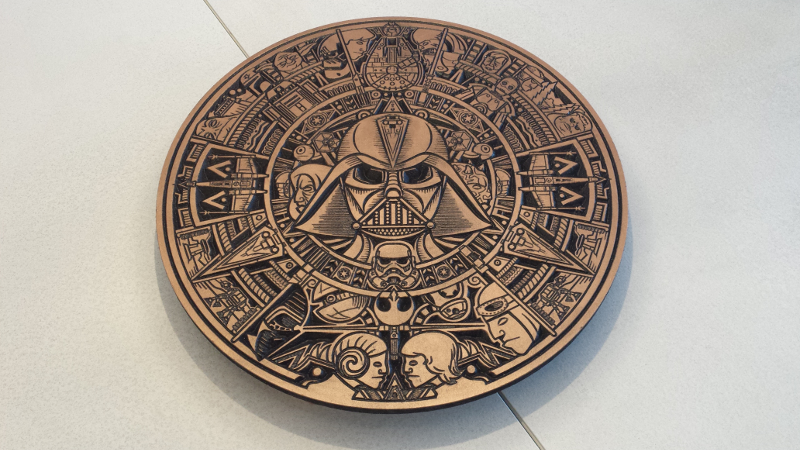
Yes, it has been done a million times before, Yes, I am not supposed to use this design because of copyright, etc…but the look on my nephew’s face when I offered it to him was worth it.
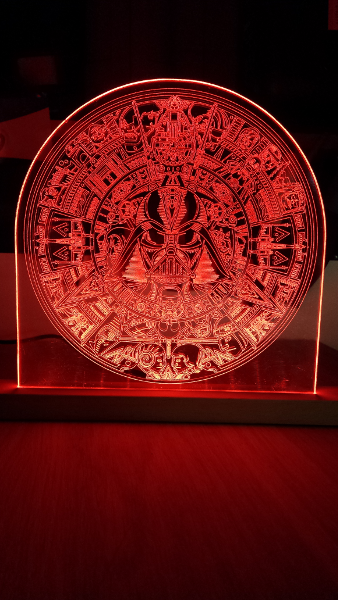
Diamong drag bit
This is one of the bits I bought last, because it is crazy expensive (for a bit). As the name says it has a small diamond tip, mounted on a spring-loaded rod, and is intended to be dragged on the surface of the material, without any rotation (i.e. router stays OFF)
This was the opportunity for me to try something I had been wanting to do for a while, an edge-lit acrylic piece:
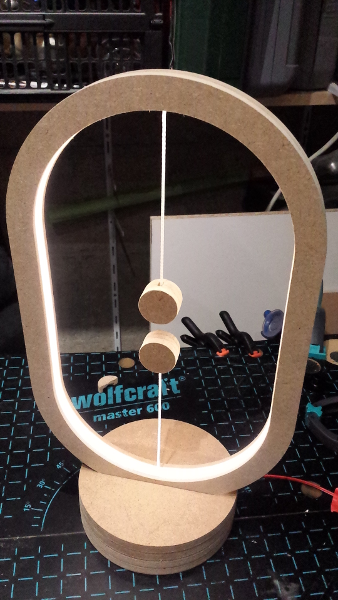
Lamps, lamps everywhere !
Then I went through a “LED Lamp” phase, and experimented with various custom design. First, a rip-off of the Heng lamp, that turns on when the two magnets are brought close to each other in the center:
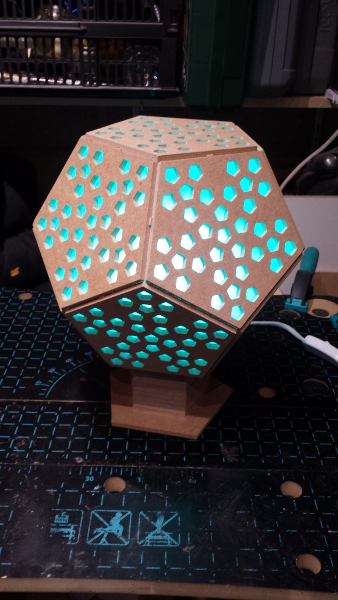
Then, inspired by a thread on the forum I tried a dodecahedron design:
But MDF is not nice enough for the living room, so I tried doing the classic cube LED lamp, with oak and thick acrylic:

It turned out ok, but light diffusion leaved a lot to be desired:
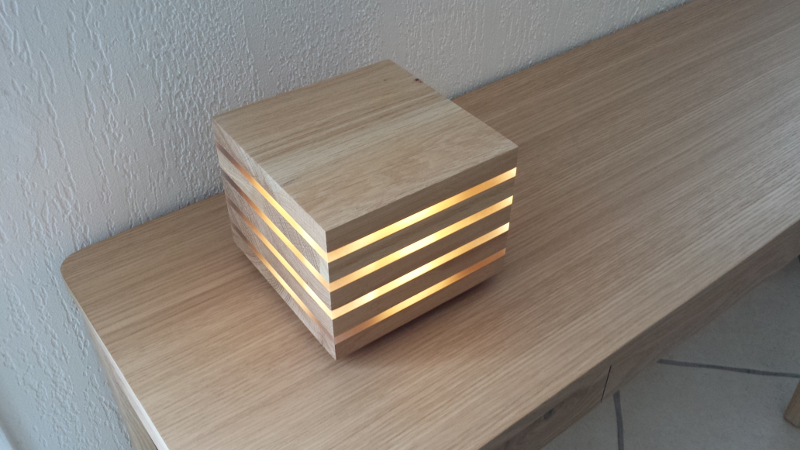
So I gave it another try, changed the design a bit : oak + plastic diffuser strips + LED strips:
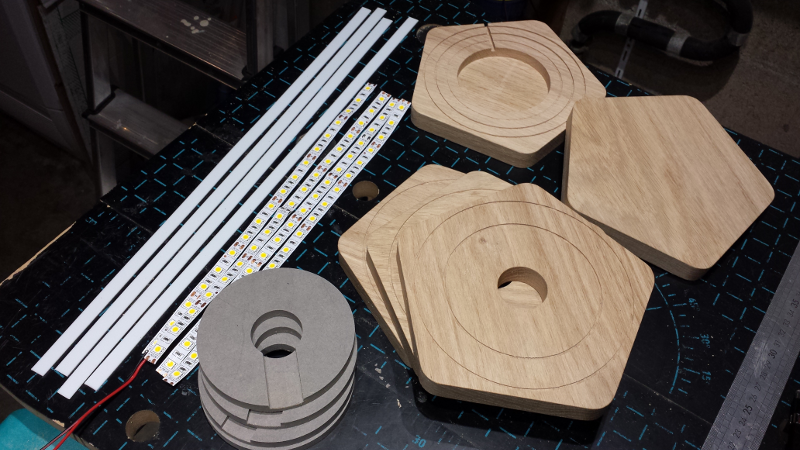
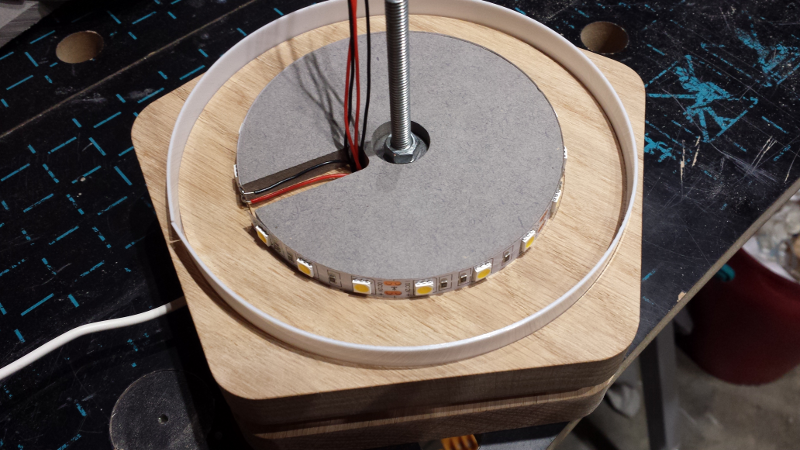
Assembled the lamp one layer at a time:
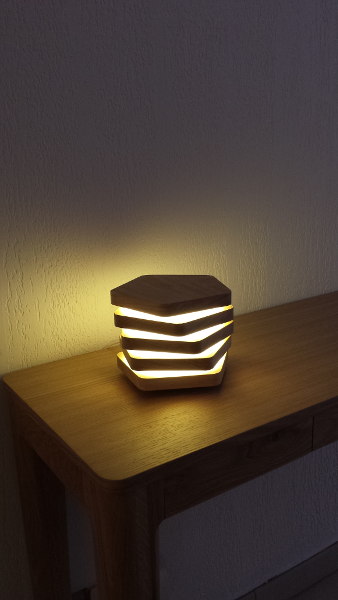
and got this, which is now permanently in the living room:
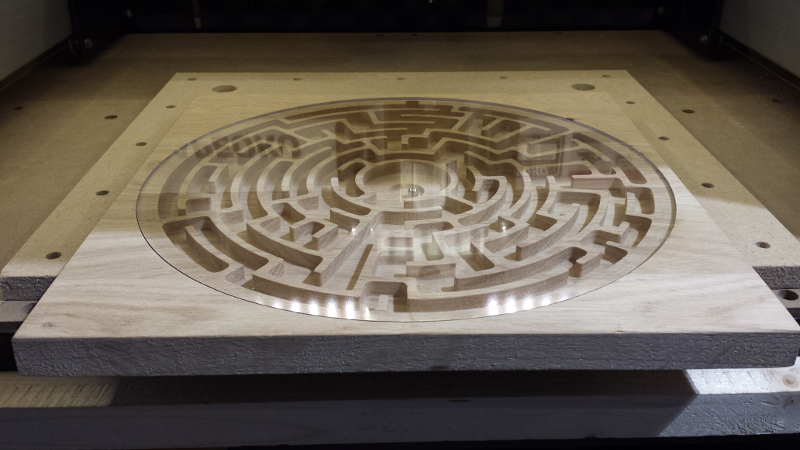
Oak
My first time cutting hardwood was for this oak maze, which, while not very original, turned out to look nice, with the acrylic cover on top:
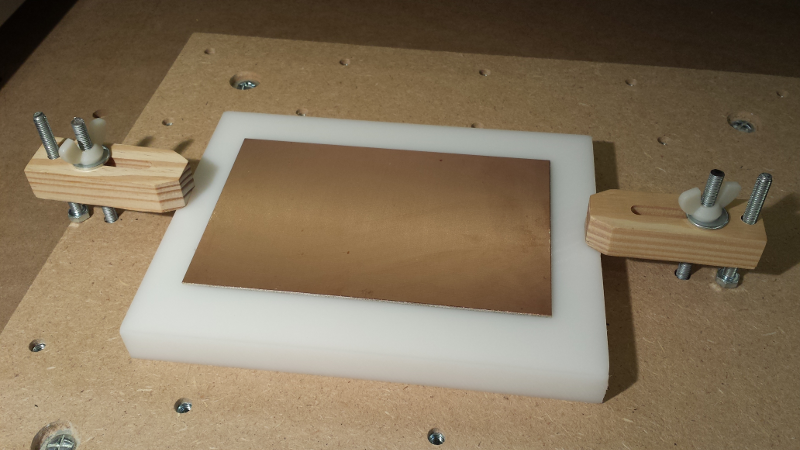
Copper clad/PCBs
I gave Carbide Copper a try, it’s the online (and free!) tool from Carbide3D to generate G-code to carve PCBs out of copper clad boards. I quickly learned that having a perfectly flat and level support was of paramount importance, and used a surfaced piece of HDPE to hold the board for carving:
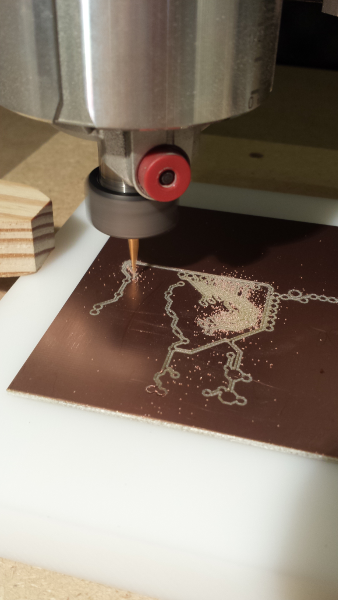
I used a sharp PCB engraving bit, and watched the magic happen:
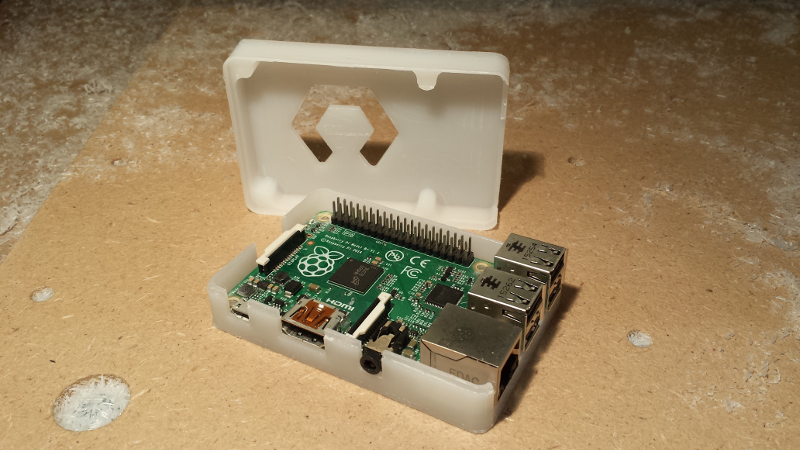
HDPE
I tried cutting HDPE, more by curiosity than need. For some reason at that time I was not using the dust shoe, so I got this nice picture of “HDPE snow”
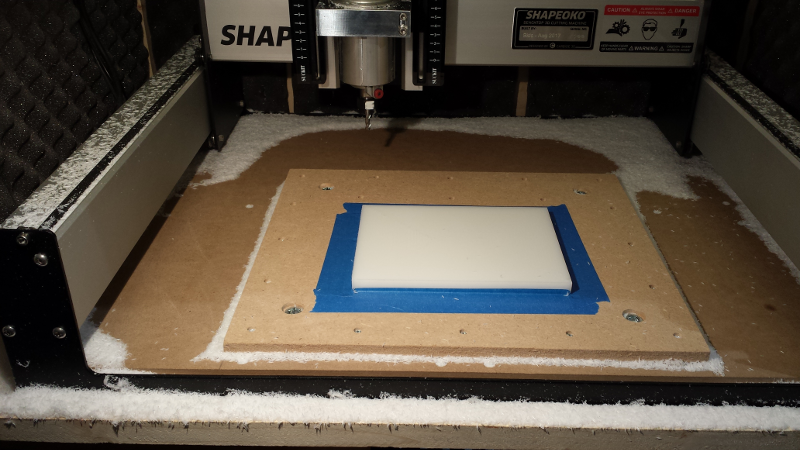
Anyway, I used this HDPE block to carve a custom enclosure for one of my Raspberry Pi boards:
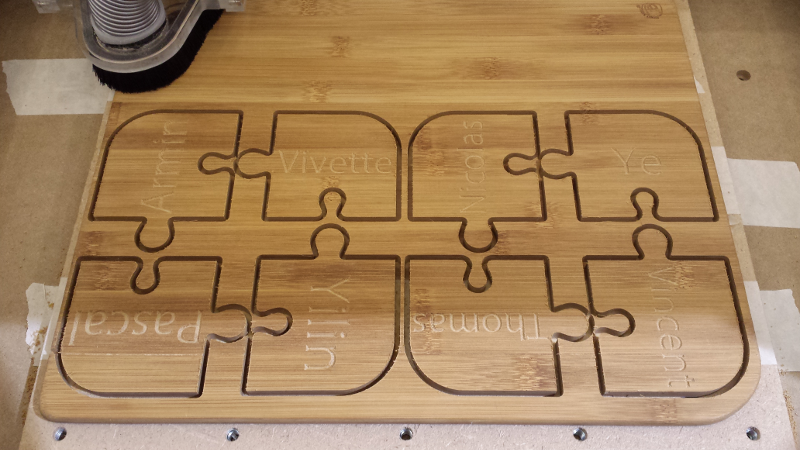
Bamboo
I have been cutting a LOT of bamboo this year. I like the look of it, but above all it cleans-up very easily after cutting with very minimal sanding, and gives nice and sharp edges. It’s like cheating, and being able to produce nice looking parts while you are still a beginner, with zero effort!
I did a few set of “puzzle coasters” for family and friends:
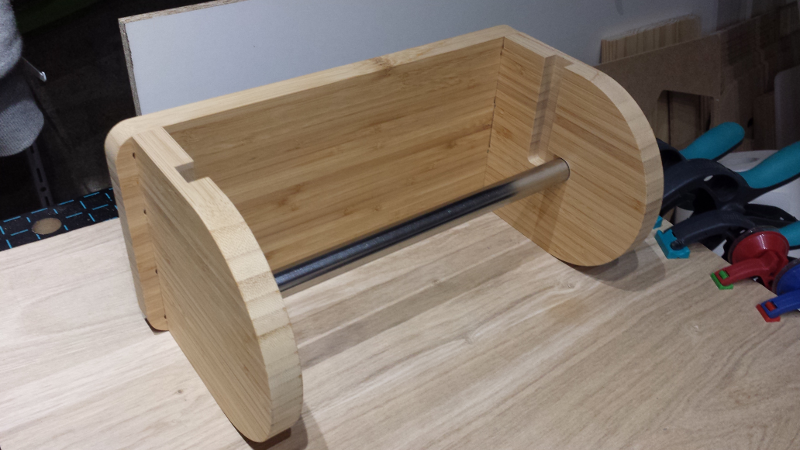
Then did a very basic but useful towel paper dispenser, now in use in the kitchen:
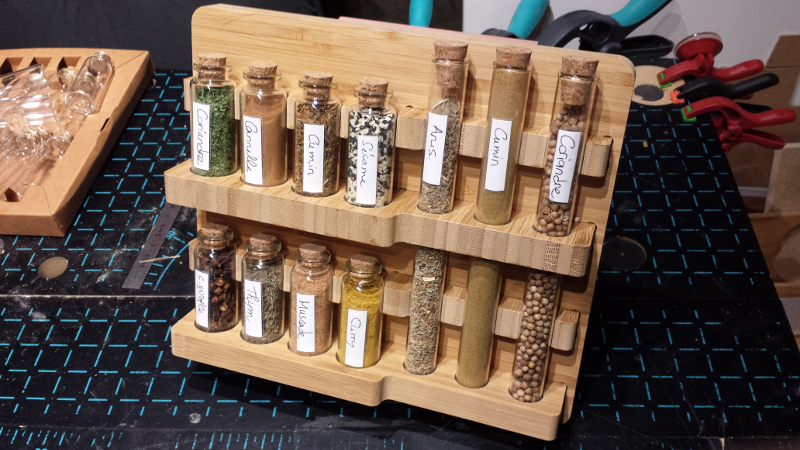
While I was in the kitchen, I did this spice rack thing:
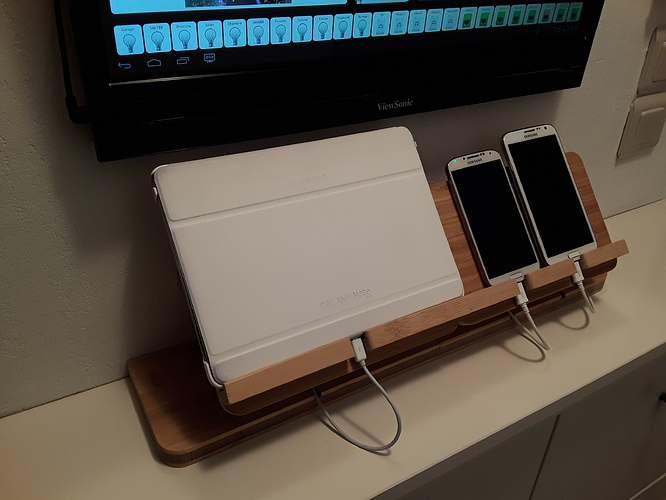
And finally, I cut a custom phone holder/charging/automatic data backup station for our phones and tablet:
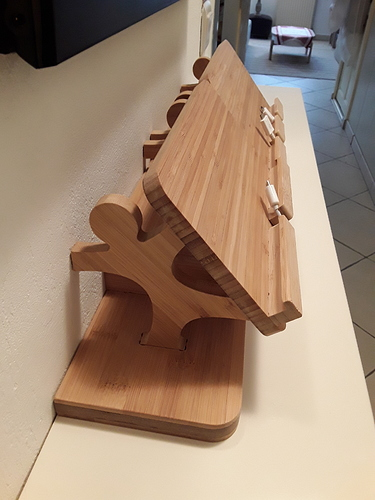
It turned out to be very convenient, and is now used daily.
Side note: the cashier at Ikea is giving my a weird look when I come back to buy another batch of 10 bamboo cutting boards…what can I do, this is the cheapest source of bamboo I found, and bamboo quality is consistently good?
Where to now ?
What a fun year. Future will tell whether I will get bored and move on, or use the Shapeoko only when I have a specific need, or still enjoy using it for the sake of using it and learning news tricks. Right now I have a few things on my todo/gear lust list:
- Roughing + Finish workflow
- I have run all projets without separating the jobs into roughing toolpaths following by finishing toolpaths, and I should learn how to do this (now that I outgrew Carbide Create)
- Nomad…
- for smaller/finer CNC jobs, I would really like to give the Nomad a try someday. I cannot justify buying it right now, but who knows.
- Additional endmills
- one type I would like to try is a compression endmill, to get nice clean edges on top of the material.
- Touch probe
- I do not mind the manual zeroing procedure, but for sure it would be cool to get the Carbide3D probe and automate/simplify this step.
- Laser module / laser cutter upgrade
- They sell laser kits to be mounted on the gantry, which can pretty much transform the Shapeoko into a laser cutter too. But I don’t know enough about practical laser cutting yet, and it SEEMS to me that it would be a better idea to get a real/dedicated laser cutter instead, and not have to care about thermal cooling, eye protection, changing the bed of the shapeoko, etc…so we will see. I have been monitoring the release of the Dremel laser cutter (a.k.a Laser cutter for rich dummies), but who knows when it will actually be released (for real).