Visio tips & tricks
This is my personal memo of miscellaneous tips to improve (my) day to day use of Microsoft Visio.
- Select objects by type
- Avoid connector mayhem
- Disable automatic connector split
- In-diagram layer visibility toggle
- Export part of diagram as an image
Select objects by type
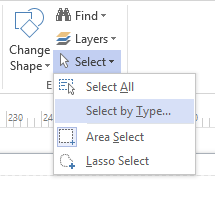
A quite handy feature is the ability to select all objects of a specific type on a page, e.g. all existing connectors: the Select by type action is a sub-item of the Select menu:
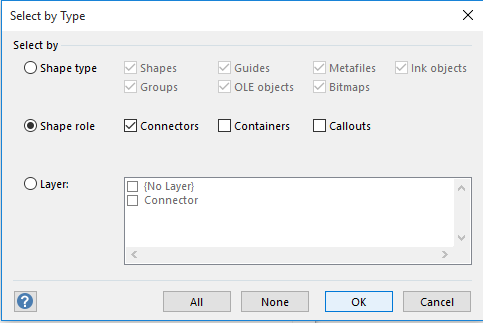
Then, adjust criteria as needed, for example for selecting all connectors:
Avoid connector mayhem
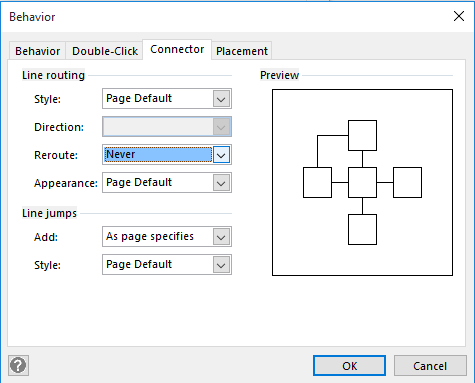
I hate it when moving an object results in nearby links to reposition automatically like crazy. Fortunately there is a way to disable this behavior: select a link (or all links), go to Developer tab, click on the Behavior menu, and adjust the Connector/Reroute setting to “Never”:
Disable automatic connector split
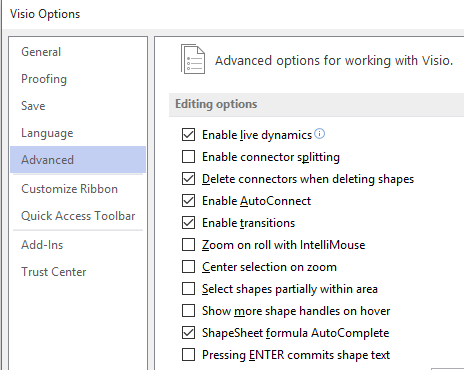
By default, dropping a shape in the middle of a connector results in the connector being automatically split in two, and reconnected to the dropped shape sides (sometimes in a messy way). 99% of the time I prefer disabling this behavior, in the Advanced options menu, by unselecting the Enable connector spitting option:
In-diagram layer visibility toggle
Layers are a cornerstone of Visio, and make my life so much easier when I have to come up with a complex diagram with lots of information of different nature. I like to have all the relevant information on a single diagram, and then just be able to switch between different views of the same underlying data: layers are a great way to do this.
However, when using layers quite often, the repeated action of multiple clicks (clicking on Layers menu => then clicking on Layer properties => then clicking on checkboxes…) required to adjust which layers are visible gets a little tedious.
Once layer definition is stable, an easy and more efficient alternative is to insert visio Controls inside the diagram itself, to enable or disable each layer in one click. The two candidate controls for this are the checkbox and the toggle button, available from the Developer tab:

The checkbox control would be perfect IF it did not have an annoying property: even though the checkbox text font/size can be modified, the size of the box itself cannot be resized. This means that on diagrams requiring to zoom out a lot, the checkbox can become ridiculously small, and not usable in practice anymore. I went for a toggle button instead, which can be resized arbitrarily.
Once the toggle button is placed on the diagram, to add some code to handle the button push action, switch to Design Mode in the Developer tab, right-click the button, select Toggle button object and View Code, then insert the VBA code as required:
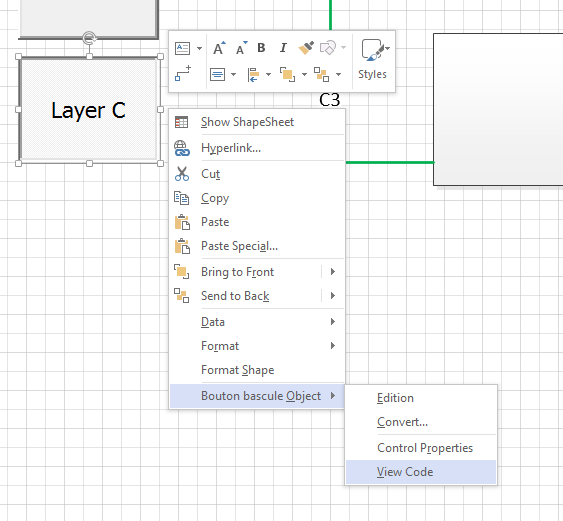
As an example, I use this code snippet to activate/dea-activate a specific layer based on the push-button’s state:
Private Sub ToggleButton1_Click()
    Dim LayersObj As Visio.Layers
    Dim LayerObj As Visio.Layer
    Dim LayerName As String
    Dim LayerCellObj As Visio.Cell

    Set LayersObj = ActivePage.Layers
    For Each LayerObj In LayersObj
        LayerName = LayerObj.Name
        If LayerName = "Layer1" Then
            Set LayerCellObj = LayerObj.CellsC(visLayerVisible)
            If ToggleButton1.Value Then
                LayerCellObj.Formula = True Or 1
            Else
                LayerCellObj.Formula = False Or 0
            End If
        End If
    Next
End Sub
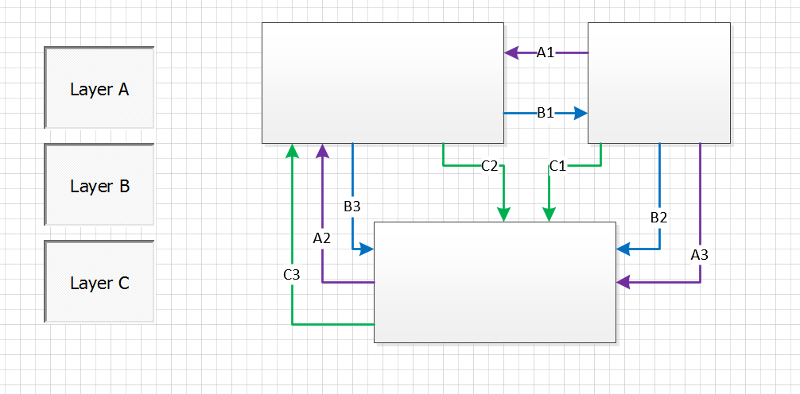
Et voila, now the button on the diagram can be used to hide/show the associated layer very quickly. I usually create one such toggle button per useful layer on the diagram, this has the added benefit to show at all times which layers are currently activated and which are not, without having to go into the Layers menu.
Here is a dummy example with all layers activated:
And the same example after clicking LayerA and LayerB buttons:
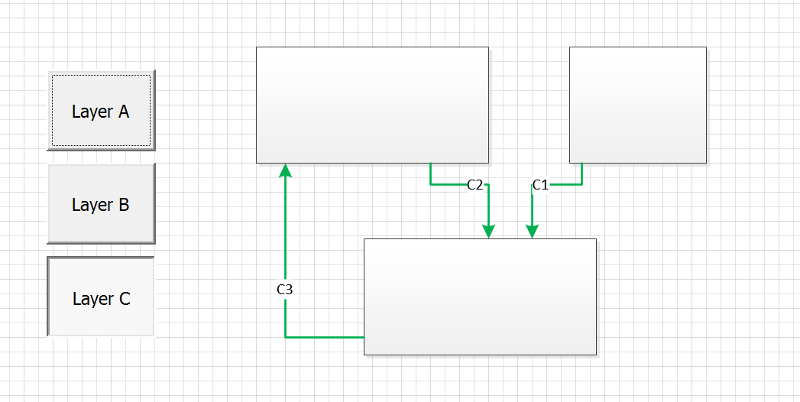
An obvious flaw is that if you then change a layer visibility manually from the layer menu icon, the button state might temporarily become inconsistent with the layer activation state. One could write some hook code triggered on layer visibility changes, to solve this (minor) inconvenience.
Export part of diagram as an image
I never quite manage to get what I want when using the regular “save as image” function, so this is my routine to export part of a diagram into an image of the size I want:
- Select the elements to be exported (e.g. to have an image that covers exaclty the selection, no more no less)
File=>Export=>Change File Type, and selectSVG Scalable Vector Graphics- import saved SVG in Gimp (or other image processing tool): one can then set the specific width/height of the image to be rendered from the SVG
- flatten image and save.
