
Raspberry Pi tips and tricks
Below is a set of notes to myself regarding various tips and tricks I had to use across my projects based on Raspberry Pi:
- Disable onboard sound (Raspbian Wheezy)
- Disable onboard sound (Raspbian Jessie)
- Set USB sound card as ALSA default
- Customizing hostname
- Determine installed distribution
- Enabling I2C bus
- Using an external RTC
- Wifi robustness
- Grabbing a screenshot remotely from SSH
Disable onboard sound (Raspbian Wheezy)
Edit /etc/modules, comment out snd_bcm2835, and reboot
Disable onboard sound (Raspbian Jessie)
Add blacklist snd_bcm2835 in /etc/modprobe.d/alsa-blacklist.conf, and reboot
Set USB sound card as ALSA default
On Raspbian jessie, to set an external USB sound card as the default card used by ALSA (instead of the internal bcm2835 snd card), edit
/usr/share/alsa/alsa.conf
and change defaults.ctl.card and defaults.pcm.card to the id of the USB snd card (“1” in my case):
defaults.ctl.card 1
defaults.pcm.card 1
Customizing hostname
By default, any raspberry pi has the hostname raspberrypi assigned to it, which may turn out to be a problem when deploying multiple raspberry pis in a single local network (for example, if two or more pis share folders over the network using samba, only one of them will be seen due to the hostname conflict). To customize the hostname of each individual raspi, refer to this page.
Determine installed distribution
To check which linux distribution is installed on a pi:
cat /etc/os-release
Enabling I2C bus
The Raspberry Pi’s I2C bus capability is not enabled by default. Below are instructions to configure it.
For older Raspbian versions (pre-2014):
sudo nano /etc/modprobe.d/raspi-blacklist.conf
then comment out the following line (with a #)
blacklist i2c-bcm2708
For newer Raspbian versions (post-2014):
sudo raspi-config
and select Advanced Options and I2C menu.
Then for all raspbian versions:
Edit /etc/modules:
sudo nano /etc/modules
and add the lines:
i2c-bcm2708
i2c-dev
To enable access to /dev/i2C without root permissions, create a custom rule file:
sudo nano /etc/udev/rules.d/99-i2c.rules
and fill it with this content:
SUBSYSTEM==\"i2c-dev\", MODE=\"0666\"
Installing the i2C tools will turn out to be useful, as well as the python binding to access i2C:
sudo aptitude install i2c-tools python-smbus
Finally, reboot the pi:
sudo reboot
Test the I2C bus using:
sudo i2cdetect -y 1
or
sudo i2cdetect -y 0
Using an external RTC
One of my raspberrys is installed in a setup where power gets turned off with no ability to perform a graceful SW shutdown beforehand. This has at least one side effect: normally, the “fake hw clock” and NTP daemons regularly adjust system time from the internet using NTP, write down the latest system time in a file at shutdown time, and read the latest system time in this file at boot. When no SW shutdown is performed, this file does not get updated, therefore at next boot the system time is whatever was last properly written in the fake hw clock file (probably a loooong time ago). After a while, NTP daemon kicks in and re-adjusts the time properly, but still, this means that in the meantime all the logs have a wrong time stamp, which is quite confusing.
One solution is to use an actual, battery-backed real time clock module, and let the pi get its system time from there. I bought such a module (DS3231) for a few bucks:

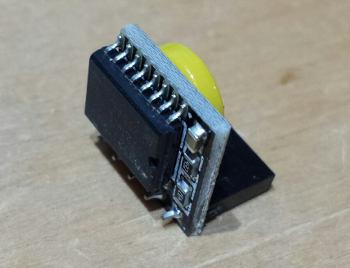
and configured it as described below.
Testing the module
Considering I2C is properly enabled on the pi, and the RTC module properly connected on I2C GPIOs, the following command:
sudo i2cdetect -y 1
should detect the RTC module at address 0x68 (note: for some pi models, use “0” instead of “1”)
     0  1  2  3  4  5  6  7  8  9  a  b  c  d  e  f
00:          -- -- -- -- -- -- -- -- -- -- -- -- --
10: -- -- -- -- -- -- -- -- -- -- -- -- -- -- -- --
20: -- -- -- -- -- -- -- -- -- -- -- -- -- -- -- --
30: -- -- -- -- -- -- -- -- -- -- -- -- -- -- -- --
40: -- -- -- -- -- -- -- -- -- -- -- -- -- -- -- --
50: -- -- -- -- -- -- -- -- -- -- -- -- -- -- -- --
60: -- -- -- -- -- -- -- -- 68 -- -- -- -- -- -- --
70: -- -- -- -- -- -- -- --
Then, load the RTC driver for this module and configure it:
sudo modprobe rtc-ds1307
sudo bash
echo ds1307 0x68 > /sys/class/i2c-adapter/i2c-1/new_device
exit
Note: DS3231 is just a better version of DS1307 module, so using the ds1307 driver is fine.
It should now be possible to read time from the RTC using:
sudo hwclock -r
To adjust the RTC internal time, force a time sync (using NTP over internet)
sudo ntpd -gq
and initialize the internal memory of the RTC from the current system time using:
sudo hwclock -w
Automating the RTC init at boot
The following instructions will make sure that the RTC driver gets loaded, and system time initialized from RTC, at each boot:
sudo nano /etc/modules
add:
rtc-ds1307
then edit:
sudo nano /etc/init.d/hwclock.sh
and copy/paste this procedure at the beginning:
init_rtc_device()
{
  [ -e /dev/rtc0 ] && return 0;

  # load i2c and RTC kernel modules
  modprobe i2c-dev
  modprobe rtc-ds1307

  # iterate over every i2c bus as we're supporting Raspberry Pi rev. 1 and 2
  # (different I2C busses on GPIO header!)
  for bus in $(ls -d /sys/bus/i2c/devices/i2c-*);
  do
    echo ds1307 0x68 >> $bus/new_device;
    if [ -e /dev/rtc0 ];
    then
      log_action_msg "RTC found on bus `cat $bus/name`";
      break; # RTC found, bail out of the loop
    else
      echo 0x68 >> $bus/delete_device
    fi
  done
}
Modify the “start)” part to call this procedure, as well as comment out the udev detection:
case "$1" in
   start)
       [...]

      init_rtc_device

#      if [ -d /run/udev ] || [ -d /dev/.udev ]; then
#      return 0
#      fi
Finally, remove the old “fake hw clock” daemon and associated cron jobs:
sudo update-rc.d hwclock.sh enable
sudo update-rc.d fake-hwclock remove
sudo apt-get remove fake-hwclock
sudo rm /etc/cron.hourly/fake-hwclock
sudo rm /etc/init.d/fake-hwclock
and reboot (note: for a pi with no internet connection, you may want to disable NTP daemon too)
Wifi robustness
Wifi dongles can pull quite a lot of power from the USB ports, sometimes resulting in all kinds of nasty intermittent issues. Below are a few things to maximize wifi connection availability:
- Using a powered USB hub. When space is not a problem, a good externally powered USB hub will go a long way improving the overall stability.
- Check that power management is turned off on the Wifi device, using:
cat /sys/module/8192cu/parameters/rtw_power_mgntIf this returns 1, power management is enabled. If it is, the wifi dongle may go to sleep after a while, and there goes your remote connection. To disable power management on Wifi dongles using the 8192cu / 8188cus chipset, create and edit a new file /etc/modprobe.d/8192cu.conf
sudo nano /etc/modprobe.d/8192cu.conf
and paste the following:
# Disable power saving
options 8192cu rtw_power_mgnt=0 rtw_enusbss=1 rtw_ips_mode=1
Then reboot and check power management is now OFF:
cat /sys/module/8192cu/parameters/rtw_power_mgnt
should now return 0.
Grabbing a screenshot remotely from SSH
When using the hevywieght variant of the Raspberry pi Raspbian distribution, with X server/GUI, the following can be used to capture a screenhost remotely from an SSH shell:
install ‘scrot’ if not done already:
sudo apt-get install scrot
then use it to grab the screenshot. The trick is to specify the DISPLAY:
DISPLAY=:0 scrot file.png